¶ 1- OPEN YOUR SCENE
1 - Open your Maya and go to SFS (Studio Singing Frog) and choose anim_tool.
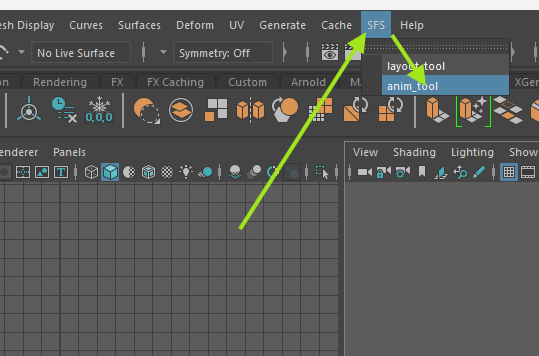
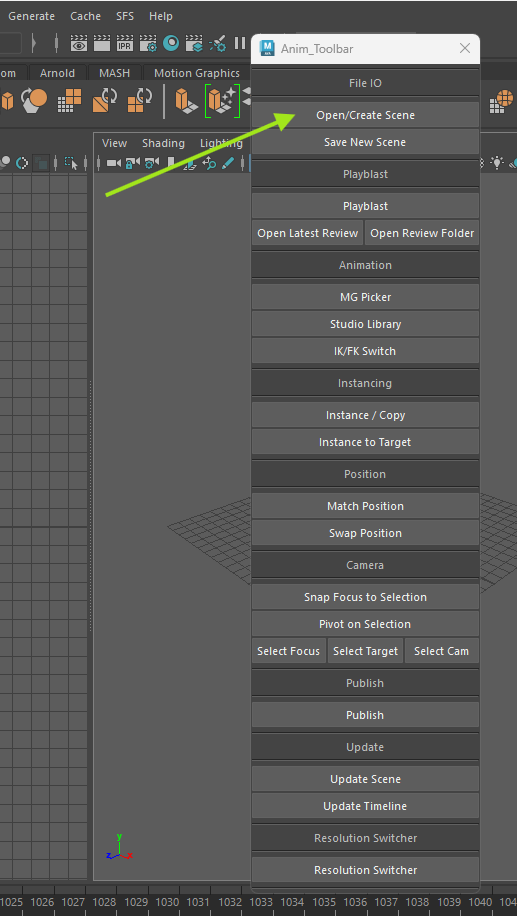
2 - Inside you will find all the basic tools you'll need.
To open a scene please click on “open/create scene”. This will open the Mini TAS MANAGER.
3 - In it you can select your seq, your shot and the task you are working on. Then click on “build new scene”.
¶ 2- BEFORE ANIMATING
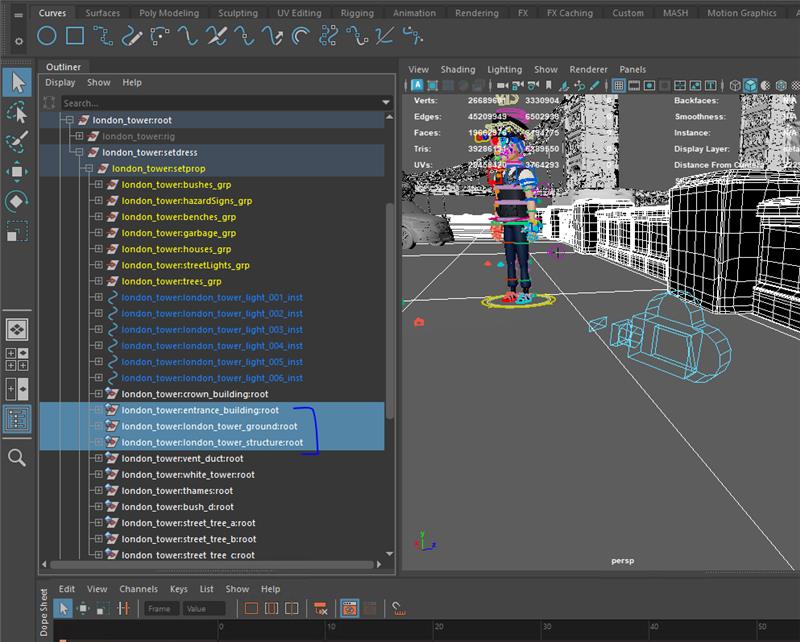
1 - When the scene is open, you should have the characters and props like they are in frame 1, not posed (blue arrow).
In the outline, you should fine a gpu cache group with the layout animation (red arrow).
.png)
2 - To make the build quicker, all the set will be in low resolution.
For each shot, there is a “main set”, it's the set where the action plays in the environment (many sets together). To know it, just check on which set are the characters and cam.
It can also be found on SG in the column “'main set” in your shot.

This set needs to be switch on base resolution.
To do so, you can :
- take the entire set ‘’:root'' and go on your SFS Anim_Toolbar and click on “resolution switcher” at the very bottom
.png)
.png)
BUT !!!
- if it's still too heavy, you can select the asset inside the set that you want in base resolution : walls, ground… just take the root of the choosen asset in the outliner and go on resolution switcher again.
THIS IS THE TROUBLE SHOOTING FOR :
- if the characters and cam seems to be under the ground and not looking like the layout.
- if the wall or any part is flickering and near clip plane does not help.
3 - This resolution switcher works on characters too !
So you can keep the characters you are not working with in static mesh “low resolution” and switch them to “base resolution” when you need them.
4 - You also have a plane with the SB in there, you can command it from here.
.png)
¶ 2- SAVE YOUR SCENE
You can save your scene by clicking on “save new scene” into the anim_tool. It will increment.
Please
- don't change the name of the scenes
- don't change the versions yourself
- keep the save scene in .ma
- keep the file structure as is